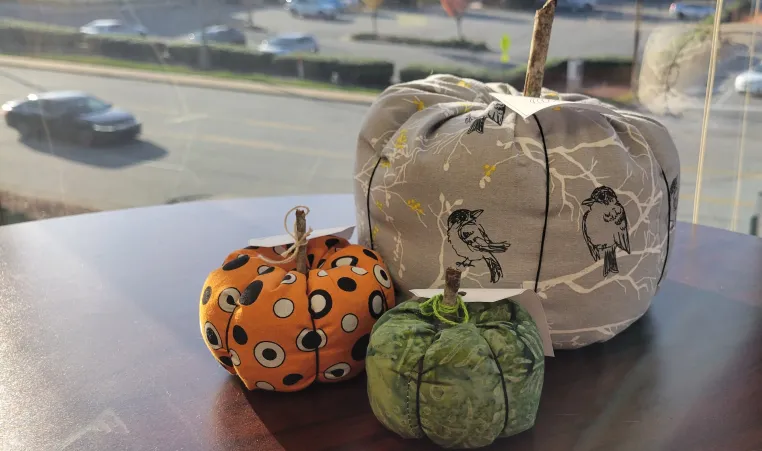
Seize the last weeks of fall by making this beautiful and easy kid-friendly DIY craft just like they did at Camp Weaver! It can be a simple but great way to include the little ones in a fall activity. Plus, you can also make this a completely green DIY as it is possible to use recycled materials to create these adorable pumpkins of any size. Feeling creative? Follow the instructions below to create these pumpkin decors.
Materials
- ¼ yard of recycled fabric (it can be a remaining piece from another project or even an old piece of clothing, like a t-shirt or a sweater)
- Embroidery thread
- Hand sewing needles
- Fabric adhesive or hot glue gun
- A small stem
- Scissors
- Something to fill the pumpkins (old socks, filling of an old pillow or teddy bear)
- Seamstress measuring tape
- Ribbon or lace (optional for decoration)
Instructions
- Start with your fabric inside out. Fold it in half and cut a rectangle in your desired size. For a medium-sized pumpkin, 7.5” x 8” is recommended, but you can choose any size. When you unfold the fabric, the length should be twice the height (e.g., 8” unfolded is 16” by 7.5”).
- Use fabric adhesive or a hot glue gun to glue about ¼ inch of the fabric's edge. Let it dry for a few minutes.
- Start threading on the left side and weave the needle and thread around the fabric's diameter. Pull the thread tightly and tie to secure when you reach the other side.
- Leave a small tail with the thread and gather the threaded fabric. Wrap the thread around to create a small stem and tie off any excess thread.
- Flip your pumpkin inside out, so you have the fabric print on the outside.
- Stuff the pumpkin with a filling of your liking, ensuring to pack the sides while leaving the middle open.
- Repeat step 3 to close the top of the pumpkin. Tie off when the pumpkin feels plump and full.
- Create pleats by threading the needle from the bottom to the top of the pumpkin, pulling the thread over the side tightly, and repeating for another 4 pleats. Alternate sides for each pleat, ensuring you keep the thread tight to achieve a pleating effect.
- Grab a stem and cut it to your desired length. Use the hot glue gun to glue it on top of your pumpkin.
- Add a ribbon bow to the stem to add an extra touch!
And there you have it! A beautiful, recycled pumpkin perfect to decorate the house, give to someone you love or to have on display at Thanksgiving. Remember you can involve children more by letting them choose between fabrics or colors, in the decoration of the pumpkin and by walking around with them to find the perfect stem.
We hope you enjoyed this fall project inspired by our very own Camp Weaver!
Published on November 20, 2023